Happy Halloween! I posted a tutorial on how to do the Quoth the Raven card! Check it out under Instruction Sheets or here!
Friday, October 30, 2015
Monday, October 12, 2015
Peaceful Trees
I love white on white cards!! I made this one with the new Woodlands folder. It's tough to photograph white on white cards. There's some Dazzling Details on the branches - just hard to see.
Saturday, October 10, 2015
October Newsletter - get yours today!
I just finished my October Newsletter - let me know if you want a copy -
it includes Joseph's Coat Technique, tips on the Acorn Punch, a
Comparison of Black Inks, Into the Wild Sour Cream Container and a
Halloween Treat Bag. Subscribe to the right.
Thursday, October 8, 2015
RemARKable Blog Tour - October
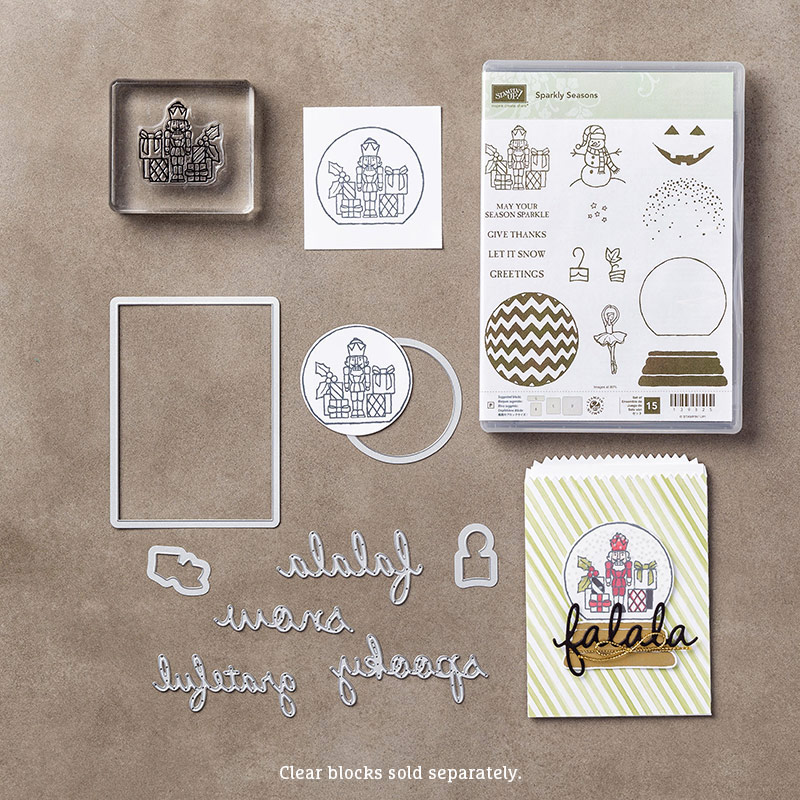
Thank you for stopping by on the RemARKable Blog Tour. This month, I decided to use the Sparkly Seasons Bundle from the new Holiday Catalog.
For my project I did a little Luminary using the new Gift Bag Punch Board.
I just had to share my quilt in progress too! Cute cat, huh?
They are a little tricky to make - here's how:
Cut a piece of Basic Black paper 6" x 10" and use the Gift Bag Punch Board to cut out a Small bag. Fold on the fold-lines and press the top together so you only see the front of the bag.
Now use the Mini Treat Bag die to cut the top of the gift bag so that it looked like you used Pinking Shears. But as we all know - those are for fabric!!! This is tricky - you want to put the bottom of the bag above the die and the top of the bag under the die. or you can cheat like I did and only run the Big Shot into the first inch or so.
And now it's time to use the Sparkly Seasons Bundle! You need the circle die. Fold the bag so that you can cut the front and the back of the bag at once in the Big Shot.
Now cut two 2.5" x 3.5" pieces of Vellum and attach to the back of the Gift Bag where the circles are. Stamp the Jack-o-Lantern face on the vellum circles with black Staz-On. Let dry.
Put the bag together. You will need to cut a notch in the small side so it doesn't show in the vellum circle.
Add tea lights and you have a Luminary. I added a little piece of Spider web on the top for bling. Now you have a safe Luminary that you can use for Halloween!

For my project I did a little Luminary using the new Gift Bag Punch Board.
I just had to share my quilt in progress too! Cute cat, huh?
They are a little tricky to make - here's how:
Cut a piece of Basic Black paper 6" x 10" and use the Gift Bag Punch Board to cut out a Small bag. Fold on the fold-lines and press the top together so you only see the front of the bag.
Now use the Mini Treat Bag die to cut the top of the gift bag so that it looked like you used Pinking Shears. But as we all know - those are for fabric!!! This is tricky - you want to put the bottom of the bag above the die and the top of the bag under the die. or you can cheat like I did and only run the Big Shot into the first inch or so.
And now it's time to use the Sparkly Seasons Bundle! You need the circle die. Fold the bag so that you can cut the front and the back of the bag at once in the Big Shot.
Put the bag together. You will need to cut a notch in the small side so it doesn't show in the vellum circle.
Add tea lights and you have a Luminary. I added a little piece of Spider web on the top for bling. Now you have a safe Luminary that you can use for Halloween!
Here's the Sparkly Seasons Bundle and my ingredients below: Don't forget the tea light!

Thank you for joining me on the tour - see you next month!
And you are now ready to hop over to the next Blog on the Tour!
Arden Dougan - That's Me!
Friday, October 2, 2015
If the Broom Fits...
I love making Halloween cards. This is a very quick and simple card. - And it's a great excuse to show you a little bit more of my quilt-in-progress! I used a scrap of my spider web from these cards - those lovely webs are way too valuable to throw out!
Labels:
Halloween
Subscribe to:
Posts (Atom)


