Showing posts with label Halloween. Show all posts

Wednesday, October 28, 2020

Coming Home - for Halloween!


The Coming Home bundle can also be used for Halloween! I got this idea from Ann Krucek. There are a few little extras from retired stamps like the Glamper. This is really fun to do!


Sunday, August 28, 2016

Ghouls Just Want to Have Fun!

I just have to share! I got first prize in a card contest yesterday at the Northern Virginia My Stamping Friends event.

I made a spooky little card with the new Mr. Funny Bones stamp set - available September 1 in the new Holiday catalog. I put together the words with the Labeler Alphabet stamp set. Sorry, I would have taken another photo but I only made one.

My backup skeleton had a little hand issue.


Friday, October 30, 2015

Happy Halloween Tutorial

Happy Halloween! I posted a tutorial on how to do the Quoth the Raven card! Check it out under Instruction Sheets or here!

Thursday, October 8, 2015

RemARKable Blog Tour - October

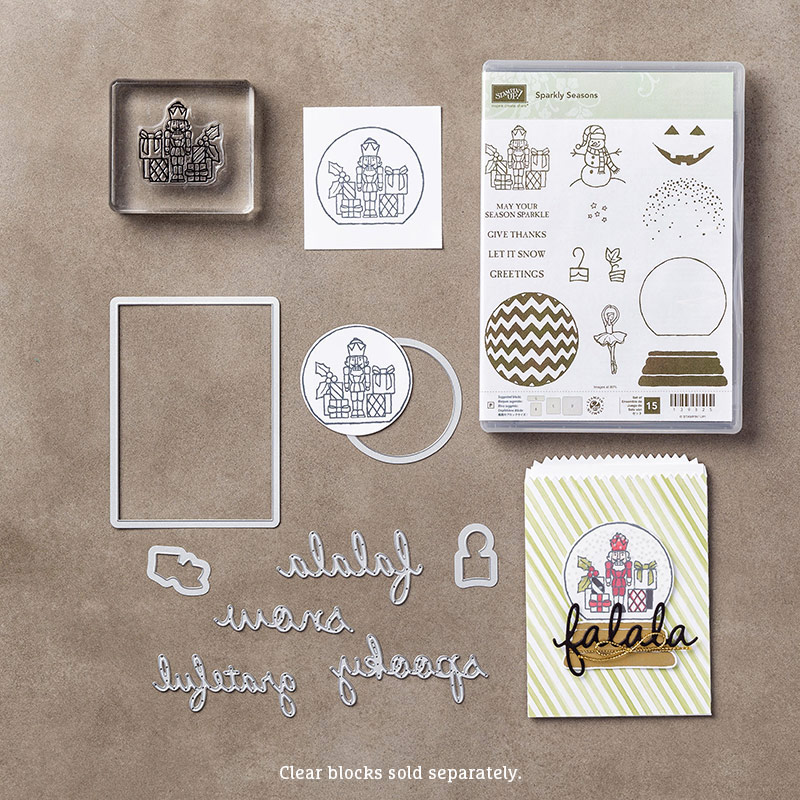
Thank you for stopping by on the RemARKable Blog Tour. This month, I decided to use the Sparkly Seasons Bundle from the new Holiday Catalog.

For my project I did a little Luminary using the new Gift Bag Punch Board.


I just had to share my quilt in progress too! Cute cat, huh?

They are a little tricky to make - here's how:

Cut a piece of Basic Black paper 6" x 10"  and use the Gift Bag Punch Board to cut out a Small bag. Fold on the fold-lines and press the top together so you only see the front of the bag.

Now use the Mini Treat Bag die to cut the top of the gift bag so that it looked like you used Pinking Shears. But as we all know - those are for fabric!!! This is tricky - you want to put the bottom of the bag above the die and the top of the bag under the die. or you can cheat like I did and only run the Big Shot into the first inch or so.


And now it's time to use the Sparkly Seasons Bundle! You need the circle die. Fold the bag so that you can cut the front and the back of the bag at once in the Big Shot.

 Now cut two 2.5" x 3.5" pieces of Vellum and attach to the back of the Gift Bag where the circles are. Stamp the Jack-o-Lantern face on the vellum circles with black Staz-On. Let dry.

Put the bag together. You will need to cut a notch in the small side so it doesn't show in the vellum circle.

Add tea lights and you have a Luminary. I added a little piece of Spider web on the top for bling. Now you have a safe Luminary that you can use for Halloween!

Here's the Sparkly Seasons Bundle and my ingredients below: Don't forget the tea light! 


Thank you for joining me on the tour - see you next month!


And you are now ready to hop over to the next Blog on the Tour!

Next Blog


Arden Dougan  - That's Me!


Friday, October 2, 2015

If the Broom Fits...

I love making Halloween cards. This is a very quick and simple card.  - And it's a great excuse to show you a little bit more of my quilt-in-progress! I used a scrap of my spider web from these cards - those lovely webs are way too valuable to throw out!


Built for Free Using: My Stampin Blog


Thursday, September 24, 2015

Quoth the Raven

I wanted to make a really Spooky card using the Acrylic Block technique.

Just like in my previous blog post here, I used the thick Whisper White paper for the watercoloring. It just holds up better and doesn't pill. I colored the block with an assortment of neutral colors: Delightful Dijon, Crushed Curry, Basic Gray and Tip Top Taupe with my Stampin' Write markers. Then I spritzed it with water, smooshed on the paper and voila!

To be artsy, I used my Alphabet Rotary stamp and cut out words from Very Vanilla paper. I made little boxes around each word with my black ink pen. Very spooky card. And NO BLING! - a first for me.


Built for Free Using: My Stampin Blog


Thursday, September 10, 2015

RemARKable Blog Tour - September

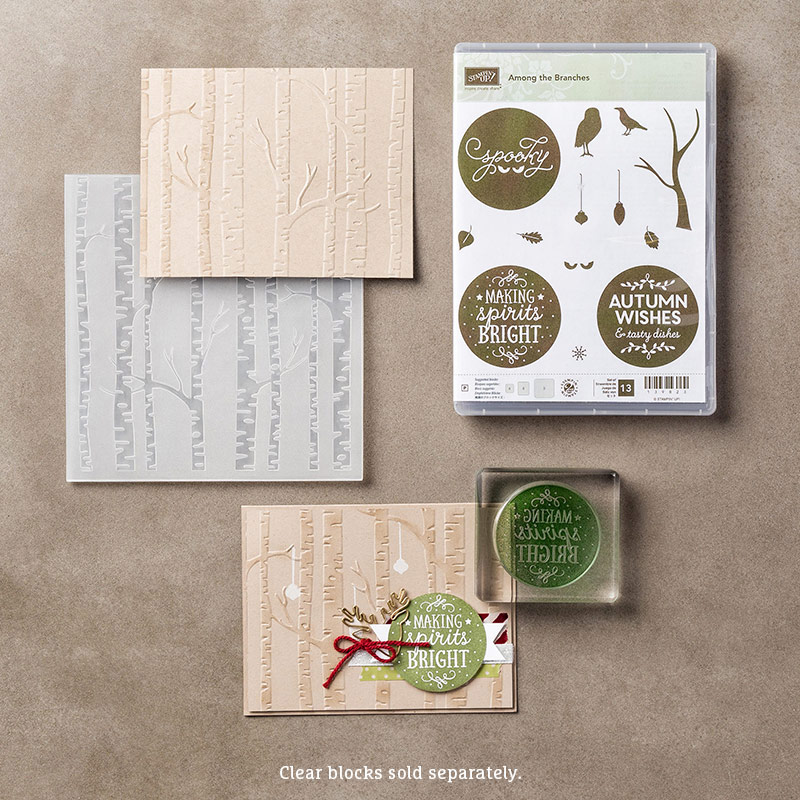
I'm thrilled to be a part of the RemARKables Blog Hop this fall! We are focusing on Bundles in the new Holiday Catalog. I picked my favorite - the Among the Branches Stamp Set.I've made five different cards from this set - so far - and now I dream about birch trees! We had birch trees in my yard growing up. I remember that my mom used to put birch branches in our fireplace. Once I lit a fire and burnt them. BOY was she mad! I didn't know they were just for show!


My card to share is this "Spooky" one:

Here's the bundle, #140872:


First I used a Brayer to ink Basic Gray Archival ink onto the Woodland Textured Impressions Embossing Folder. I did not apply the ink evenly, I hoped to achieve a misty look to the background.  It turned out darker in the middle and lighter toward the edges. 

I wanted the trees to stay light, so I went back and used a Q-tip and cleaned up any smudges with Stampin' Mist Stamp Cleaner. Then I pressed it onto Very Vanilla paper in my Big Shot. I found that Whisper White was too bright for this card.

 The following picture shows the paper and 2" circle "Spooky" from the coordinating Among the Branches stamp set. I adhered the Spooky with dimensionals.The spider web is so easy to stick on with the new fine tip glue pen.
Then I just stamped a black raven and a couple of sets of eyes in the forest. And one more look at the finished card:

Be sure and check out my blog this month every week for more Among the Branches examples! Here's a sneak peak of a Christmas version:

Thank you for joining me on the tour - see you next month!


And you are now ready to hop over to the next Blog on the Tour!


In case you get lost, here's the tour stops:


Arden Dougan<---That's me! 


 Here's my list of ingredients:
Built for Free Using: My Stampin Blog


Monday, September 7, 2015

Spooky Trees

I'm in a Halloween mood this week - maybe all month! I decided to see if I could get a moon in among the branches of the Woodland Textured Embossing Folder.


To achieve this effect, I first embossed the Crushed Curry paper with the Embossing Folder. I carefully placed the card in the folder so that I could have room for the raven to sit on the branch in front of the moon. I ended up making 10 of these and so I marked the spot with painter's tape.

Then I cut out a 2" circle in scrap paper with my 2" paper punch and cut a flat side with scissors. I lined up the flat side against the trees and just sponged the card around the moon with Crumb Cake. I wanted it to be darker on the right side. To color the trees and branches on the moon, I carefully used a Q-tip lightly dipped in the ink.

Then stamped the raven in the moon.

I stamped a Spooky from the Among the Branches stamp set with Delightful Dijon and then came back and put in black eyes and cut it out with a 2" paper punch. I adhered the Spooky circle with dimensionals.

The leaves were inked with one color marker and then I "pounced" on the stamp with another marker to make it look like fall leaves.

The Spider Web is oh so easy to  glue on with the new fine tip glue pen.

thanks for looking!

Built for Free Using: My Stampin Blog


Monday, October 13, 2014

Framed Pumpkins

I made this great Pumpkin picture (actually last year!) CASE'd from someone - wish I knew her name). The pumpkins are made from oval punches and then were embossed using my collection of embossing folders (mostly retired) and lots of fall-colored papers on a vanilla base. . Finished it off with a striped ribbon.


Sunday, October 12, 2014

October Stamp Camp

It's been crazy here lately, but I wanted to share a picture from yesterday's Stamp Camp. One of my Campers sent me a collage of the items she made.


Related Posts Plugin for WordPress, Blogger...